Welcome to the world of DIY home repairs and fixing things at home on your own! With our guidance, you can learn easy do-it-yourself (DIY) repairs. There is no need for expensive fixes—just simple solutions that improve your home.
“Fix It Yourself: DIY Home Repairs Made Easy!” isn’t just a title; it’s an invitation to learn how to improve your living space without fuss. Let’s begin this journey of doing things yourself and making your home a more comfortable place!
Fixing a Leaky Faucet:

Leaky faucets are a common problem in lots of homes in New Zealand. They can be annoying and waste water. But fixing them isn’t as hard as it sounds. Let’s take a closer look at DIY home repairs and show to repair a leaky faucet:
Step 1: Gather Your Tools:
- Wrench
- Screwdriver
- Replacement washer or O-ring
Step 2: Turn Off the Water: Begin by shutting off the water supply to the faucet. This is typically done by locating the shut-off valves under the sink.
Step 3: Disassemble the Faucet: Use a wrench and screwdriver to remove the faucet handle, exposing the inner components.
Step 4: Identify the Culprit: Inspect the washer and O-ring for signs of wear or damage. These are often the causes of leaks.
Step 5: Replace Worn-Out Parts: Carefully replace the worn-out washer or O-ring with a new one. Make sure to choose the correct size for your faucet.
Additional Tips:
- Check the type of faucet: Different faucets may require slightly different approaches, so identify the specific type you’re dealing with.
- Use plumber’s tape: Applying plumber’s tape to the threads can help create a better seal and prevent future leaks.
- If in doubt get an expert plumber in.
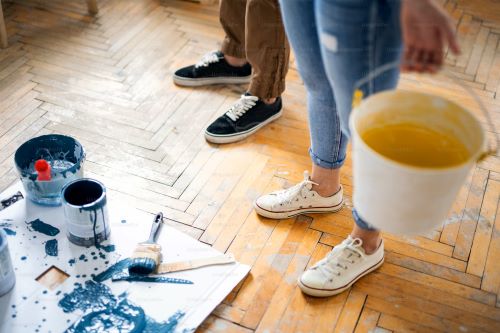
Patch and Paint Wall Holes:
You might notice holes or dents in your walls from accidental bumps or when removing wall fixtures. Don’t stress! Fixing these imperfections is something you can easily do yourself with a little DIY magic. Let’s explore a detailed guide to DIY home repairs with patching and painting to make your walls look as good as new.
Step 1: Assess the Damage: Examine the size and type of hole to determine the appropriate patching compound.
Step 2: Clean the Area: Clear away any debris or loose plaster from the damaged area, ensuring a clean surface for the patch.
Step 3: Apply Patching Compound: Use a putty knife to spread the patching compound evenly over the hole. Allow it to dry completely.
Step 4: Sand Smooth: Once dry, sand the patched area until it is smooth to the touch.
Step 5: Prime and Paint: Apply a primer to the patched area before painting. Choose a paint color that matches the surrounding wall.
Additional Tips:
- Select the right patching compound: Different compounds work better for specific types of damage, so choose accordingly.
- Primer matters: Applying a primer before painting helps the paint adhere better and ensures a more uniform finish.
Unclogging Drains:
When it comes to DIY home repairs, clogged drains happen a lot, and using strong chemicals isn’t the only solution. Let’s look into a better and more eco-friendly way to solve this common problem.
Step 1: Use a Plunger: Place a plunger over the drain and create a tight seal. Push and pull to create suction, dislodging the blockage.
Step 2: Make a DIY Drain Cleaner: Combine equal parts baking soda and vinegar and pour it down the drain. Let it sit for at least 15 minutes before flushing with hot water.
Step 3: Regular Maintenance: To prevent future clogs, perform regular maintenance by pouring boiling water down drains.
Additional Tips:
- Regular maintenance: Consider pouring boiling water down drains regularly to prevent buildup before it becomes a problem.
- Environmentally friendly alternatives: Use a mixture of baking soda and vinegar for a chemical-free solution.
- If the clog won’t budge speak ot an expert plumber.
Weatherstripping Windows and Doors:
In New Zealand, where weather conditions can vary, weatherstripping is a valuable skill to keep your home energy efficient. Let’s dive into the process:
Step 1: Identify Drafty Areas: Use a candle or incense stick to identify areas where drafts are present before applying weatherstripping.
Step 2: Choose the Right Material: Choose either sticky foam or V-shaped strips for the gaps you want to seal.
Step 3: Clean the Surface: Make sure both the window or door and the weatherstripping surface are clean so they stick well.
Step 4: Apply Weatherstripping: Carefully apply the chosen weatherstripping material to seal gaps and prevent air leakage.
Step 5: Consider Draft Stoppers: For doors, consider using draft stoppers at the base to add an extra layer of insulation.
Additional Tips:
- Check for drafts: Use a candle or incense stick to identify areas where drafts are present before applying weatherstripping.
- Consider draft stoppers: Placing draft stoppers at the base of doors adds an extra layer of insulation.
Replacing a Light Switch:
Faulty light switches are a common problem but replacing them is a straightforward task. Here’s how you can handle it:
Step 1: Turn Off the Power: Before starting, turn off the power to the switch at your circuit breaker to ensure safety.
Step 2: Remove the Faceplate: Use a screwdriver to remove the faceplate covering the switch.
Step 3: Disconnect Wires: Carefully disconnect the wires from the old switch, making note of their placement.
Step 4: Connect New Switch: Attach the wires to the corresponding terminals on the new switch.
Step 5: Reassemble: Secure the new switch in place, reattach the faceplate, and turn the power back on.
Additional Tips:
- Take a photo: Before disconnecting wires, take a photo of the existing setup to ensure correct reconnection.
- Ensure proper insulation: Make sure the wires have good insulation and aren’t worn out.
- If any doubts always seek a professional when working with electricity. Its better to be safe than sorry.
Sealing Gaps and Cracks:
New Zealand’s diverse climate can lead to gaps and cracks around windows and doors, impacting energy efficiency. Here’s how you can address this:
Step 1: Inspect for Gaps: Regularly inspect windows and doors for visible gaps or cracks.
Step 2: Choose the Right Caulk: Select the appropriate caulk for the material you are sealing and the location.
Step 3: Apply Caulk: Carefully apply the caulk to seal gaps and cracks, ensuring a tight seal.
Step 4: Inspect Seasonally: Regularly check for new gaps or cracks, especially after extreme weather conditions.
Additional Tips:
- Choose the right caulk: There are different types of caulks for various surfaces, so pick one suitable for your needs.
- Inspect seasonally: Regularly check for new gaps or cracks, especially after extreme weather conditions.
Unclogging a Toilet:

When it comes to DIY home repairs, a clogged toilet is a common household problem, but with the right tools and techniques, you can handle it on your own. Here’s a step-by-step guide:
Step 1: Plunge the Toilet: Use a plunger to create suction and dislodge the blockage. Repeat as necessary.
Step 2: Use a Toilet Auger: For more stubborn clogs, a toilet auger can break up and remove blockages.
Step 3: Prevention Tips: Educate household members on what can and cannot be flushed to prevent future clogs.
Additional Tips:
- Auger use: For more stubborn clogs, a toilet auger can be a useful tool to break up and remove blockages.
- Prevention is key: Educate household members on what can and cannot be flushed to prevent future clogs.
- Still got an issue, call a plumber.
Fixing a Running Toilet:
A running toilet can be both annoying and wasteful. Learn how to fix it yourself with these simple steps:
Step 1: Identify the Issue: Determine whether the problem lies with the flapper, fill valve, or another component.
Step 2: Adjust the Float: If water continues to run after flushing, adjusting the float can often resolve the issue.
Step 3: Replace Worn-Out Parts: Replace any worn-out components promptly to prevent further damage and water wastage.
DIY Home Repairs Additional Tips:
- Adjust the float: If water continues to run after flushing, adjusting the float can often resolve the issue.
- Replace parts promptly: Worn-out components should be replaced promptly to prevent further damage and water wastage.
With the new information and tips from this guide for Kiwi homeowners, you’re on your way to becoming a skilled DIY expert. Fixing things yourself not only saves money but also gives you a sense of pride.
Every home improvement starts with a step, and with these repairs, you’re ready to keep your New Zealand home great. Happy fixing!
When it comes to DIY home repairs, always contact an expert if you don’t know what you’re doing, sometimes its cheaper to get it done right by a professional the first time.